Cleaning Soot and Smoke Residue From a Carpet After a Kitchen Fire

0 commentsCarpet mentor says

A kitchen fire is a horrible thing to walk back into, and the carpet is rarely the worst of it. Once the drama’s over and the brigade has gone, you’re left in a room that reeks of char, a grey film creeping across a carpet that was cream a week ago, and no idea where to begin. Begin by not touching it with a wet cloth. That first instinct – to wipe the black away – is the one that turns a liftable mark into a permanent one.

The good news is that soot on a carpet is a fixable problem if you go at it in the right order. The bad news is that almost every instinct you have about it is wrong.

Why is soot so much worse than ordinary dirt?

Ordinary dirt is dry and inert; it sits on the fibre and waits to be lifted. Soot doesn’t wait. A kitchen fire hands you three separate problems: black soot you can see, an oily film you mostly can’t, and a smell that’s soaked into everything porous in the room. Water on any of it, too soon, and you spread all three.

The greasy film nobody expects

The soot from a kitchen fire is not the dry, powdery stuff a bonfire leaves. A grease fire throws off a fine, oily protein residue that lands as a film, near invisible on a pale carpet until you touch it and your fingers come up grey and slick. That grease is why water smears rather than rinses it, and why it clings so stubbornly to the fibre. It’s mildly acidic too, so left sitting it slowly damages what it’s on. And it travels: soot goes wherever the warm air went, riding the currents out of the kitchen and settling on the cool surfaces of rooms the flames never reached. People are forever startled to find a grey haze on a carpet two doors down from the fire.

You can gauge what you’re up against with a quick swipe. Press a dry white cloth or the corner of a dry sponge onto a hidden patch and lift it off: a pale grey dust that comes away clean means dry soot you can lift, while a dark, greasy smudge that clings to the cloth means the oily protein sort that fights you at every step. Swipe a few spots around the flat while you’re at it, to see how far it spread.

What should you do first – and what should you never do?

Before any cleaning, a few minutes of the right preparation saves the carpet and possibly your lungs.

Put the wet cloth down and open the windows

Two hard rules, and I mean hard. Don’t wet anything yet – not a cloth, not a spray of anything – because water on greasy soot smears it into the pile for good. And keep your ordinary vacuum cleaner well away. A domestic vacuum without a sealed filter blows the finest, most staining soot straight out of its exhaust and lays it back down around the room as a fine mist, settling wherever the warm air carries it; you’ll clean one patch and grey the whole floor doing it.

What you should do is open every window and get air moving through, because soot is a genuine health hazard – it irritates airways and skin, and it’s the last thing you want a child or anyone asthmatic breathing. Wear a proper mask and gloves. Get children out of the room, for their lungs and because the sight of it does them no favours. Then, before you clean a thing, photograph the damage from every angle and ring your insurer. A fire is one of the few carpet disasters where a rushed attempt of your own can weaken a claim, and where the policy may well cover a professional to do it properly.

How do you lift dry soot without smearing it?

The whole job turns on one principle: get every scrap of soot off dry before a drop of water goes near it. Do that well and the wet stage is easy. Skip it and you’re grinding grease into wool.

The dry sponge that does the work water can’t

Start with a vacuum that has a sealed HEPA filter, and go slowly, the nozzle held just off the surface. You’re lifting loose soot off the top of the pile without stirring it up, so no beater bar and no quick passes; both fling it back into the air. Take your time over it.

For fresh, loose soot a household trick earns its place before the sponge: sprinkle a good layer of baking soda over the marked area, leave it an hour to draw the oil up out of the pile, then vacuum it away with that same sealed machine. It won’t clear heavy or set soot, but on a light dusting it lifts a surprising amount and takes some of the smell off with it.

Then the tool that does the real work: a dry-cleaning sponge, sometimes sold as a chemical or soot sponge, a block of vulcanised rubber that lifts soot off a surface with no water at all. Wipe it across the carpet in short, one-way strokes. Watch it come away black. Here’s the bit people miss: the moment one face of the sponge turns grey, turn it to a clean side. When the whole thing’s blackened, slice the dirty surface off with a knife or start a fresh one. A saturated sponge only paints the soot back on. It’s slow, dull work on your hands and knees, and it lifts far more than you’d believe water ever could.

Only once the carpet is as clean as dry work will get it do you bring in moisture, and then it’s a degreaser, not a carpet shampoo. Protein soot is an oil, so it takes a strong alkaline cleaner to break it; the ordinary stuff slides straight off. Test a hidden patch first. Work from the outside of a mark inward, and blot instead of scrubbing, because scrubbing is only smearing with effort behind it. A proper hot-water extraction to flush the loosened residue out, then a fast dry, finishes it. If the sponge and a careful degrease still haven’t shifted it, the soot has bonded too deep for surface work, and that’s your signal to stop rather than push harder.

I got called to a first-floor flat off Stanstead Road in Forest Hill after a grill-pan fire. The tenant had done what anyone does – wet a sponge and scrubbed at the grey on the living-room carpet the second the fire was out. By the time I arrived she’d turned a light dusting of dry soot, which would have sponged off in an afternoon, into a set of dark greasy swirls ground deep into a beige twist. The soot she’d wiped had been liftable. The smears she’d made out of it weren’t, quite. Half of what I charged her was for undoing the first hour of her own work.

Why won’t the smell go away?

You can get a carpet looking clean and still have a room that announces the fire every time you walk in. Smoke smell is the part that beats most people, because it isn’t sitting on the surface where you can reach it.

The smell lives in the underlay

Smoke particles are tiny beyond imagining, and they drive down into everything porous – through the pile to the underlay and the floorboards beneath. Wherever the warm air went, the smell went with it and stayed. Clean the surface of the carpet and you take out the surface of the problem, leaving the reservoir underneath, which is why the smell comes back on the first warm day. This is the moment for the unwelcome truth: on a real fire, the underlay usually has to come up. It’s a sponge for odour and cheap to replace, and no amount of cleaning the carpet above will win while it’s down there holding the smell. I did a chip-pan fire in a flat in Tottenham where the carpet came up fine and the family still couldn’t live in the room a month on – it was the underlay, every time.

The carpet is one reservoir among several, in any case. The curtains and the upholstery drank the same smoke, and anything soft that was in the room when it burned will keep breathing it back out, which is how a spotless carpet ends up sitting in a room that still smells of the fire.

And the sprays don’t work. A deodoriser or a plug-in over smoke damage lays a perfume on top of a stench, and your nose learns to find both at once. To kill the smell for good, you remove the source and then treat the air and the fabric of the room together – the specialists do it by filling the space with a thermal fog or running an ozone or hydroxyl machine, forcing a deodorising agent into the same cracks the smoke got into. That’s beyond a bucket and a good afternoon.

When is it a job for a fire-damage specialist?

Some of this you can manage yourself on a small, contained mess. Past a certain point you’re throwing effort at a job that wants equipment you haven’t got.

Soot is a health hazard, and your policy probably pays

Hand it over when the soot is heavy, when it’s spread past one room, when the smell keeps returning after you’ve cleaned, or when it’s got into the heating or the firefighters’ water has soaked the floor. And hand it over for the protein smell above all, because that’s the one a bucket almost never beats. Two things make the call easy. Soot is a health risk you shouldn’t be living in a cloud of while you experiment, and a fire is usually a claim – your insurance will often cover professional restoration, which turns the decision from DIY-versus-paying into DIY-versus-a-covered-professional. Keep your photographs, and let someone with an air scrubber and a fogger take the room back.

Hiring a Rug Doctor vs a Professional: What You Actually Get

0 commentsCarpet mentor says

Walk into most big supermarkets in London and there it is by the exit: the red machine you can rent for the day, promising a professional-standard deep clean for about the price of a takeaway. I’ve no quarrel with it in principle. My quarrel is with what people are told it does, because for a good half of the jobs it gets rented for it’s the wrong tool, and the renter only learns that when they ring me to sort out the mess it left behind.

On paper, the rental and my machine do the identical thing. The whole argument lives in the word “paper.”

Aren’t they doing the same thing?

Both are hot-water extraction. Both wet the carpet with cleaning solution and then vacuum the dirty water back out. Same basic idea, same category of machine. If the method is the same, the fair question is why the results aren’t, and the answer comes down to how well each stage gets done. A professional clean is three moves the upright can’t match: it loosens the soil with real heat and chemistry, holds it in suspension long enough to matter, and hauls it back out with suction the rental hasn’t got.

Hot-water extraction, in theory and on your living-room floor

The theory is sound and the rental follows it faithfully. The trouble is that every stage of hot-water extraction has a dial, and the rental has those dials turned down low by the laws of physics and a thirteen-amp plug. It sprays the solution, but softly, and it heats the water barely past what comes out of your tap. What it does worst is pull that water back out. Turn all three down at once and the result is its own thing: a wet, half-finished clean that behaves nothing like the professional job it’s sold as.

Take heat first, because it’s the clearest example. Hot water does chemical work cool water can’t: it loosens the bonds holding grease and ground-in soil to the fibre, and it wakes up the cleaning agents, which get sharply more effective the hotter the water runs. A professional machine holds its water near boiling for the whole job. The rental runs at whatever your hot tap handed it, cooling in the tank from the moment you fill it, so by the second room it’s gone tepid. Tepid water and a decent detergent will still shift light soil, but they leave the greasy, trodden-in grime largely where it sits.

How much does the water you can’t get back out matter?

A cleaning machine is judged less by what it puts into the carpet than by what it drags back out. That’s the part the marketing skates over, and it’s where the rental falls down hardest.

The gallon that goes in and the pint that comes back out

The mechanism behind it is straightforward. Extraction is a vacuum, and vacuum power is airflow – how much air the machine moves and how hard it lifts. A truck-mounted professional unit shifts several times the air of a domestic rental and lifts with far more force, because it runs off an engine rather than a wall socket. The red machine plugs into your skirting board and can only pull so hard before it trips the breaker. So it leaves water behind. A great deal of it – where a professional draws out more than went in, the rental hands most of it back to the carpet.

That trapped water is where every horror story starts. The carpet stays soaked for days instead of drying in a few hours. As it dries slowly, dissolved dirt and detergent wick back up to the surface, and marks you thought you’d lifted bloom back into view a week later. The damp that sits in the pile and the backing turns the whole room musty, and on anything with a natural backing it can leave a brown tide-mark as it goes. The soil the machine couldn’t lift stays put with the leftover soap, which grabs fresh dirt, so the carpet greys over again within a fortnight.

You can measure the gap yourself, no tools needed: time how long the carpet takes to dry. A properly extracted carpet is walkable in an hour or two and bone dry by the next morning. A rental job stays wet underfoot for two or three days, and that lingering damp is the machine telling you, plainly, how much water it never managed to take out.

A couple in a Victorian terrace off Hoe Street in Walthamstow had me out after exactly this. They’d hired the machine for a tired but sound wool-mix lounge carpet, run it back and forth until the tank came up dirty, and gone to bed pleased with themselves. Two days on, the carpet was still damp to the sole of the foot and smelled like a wet dog, and three old traffic-lane marks had wicked back up darker than before they started. They hadn’t cleaned the carpet. They’d wet the dirt and shifted some of it around, then left the rest to dry back in. I spent longer drawing their water out than I’d have spent cleaning the thing from scratch.

Is it just heat and suction, or the chemistry too?

Heat and suction are half the story. The other half is what you put down and whether you get it back out.

Pre-spray, dwell, rinse – the steps the upright skips

A proper clean starts before the wand touches anything. I pre-spray the carpet with a conditioner matched to the fibre – something alkaline for a synthetic, something mild and acidic for wool, which the wrong choice will damage – and let it dwell so the chemistry has time to break the soil’s grip, then work it through the pile with a brush. Only then does the rinse pass pull the loosened soil and the spent chemical back out together. The rental has none of that. It runs one foamy detergent through a single pass, usually too much of it, with no dwell and no separate rinse, so a good part of that soap stays down in the carpet. Foamy residue is a dirt magnet, which is why a carpet “done” with a rental so often looks worse two weeks later than it did before. What you’re left with is a coat of dirt-hungry soap sitting in the pile, pulling the street back in.

There’s a rhythm to the professional version the single-pass upright has no way to copy. The pre-spray goes down and sits, dwell time doing its invisible work, while a slow-turning brush lifts the pile and drives the conditioner to the base where the soil lodges. The rinse that follows is balanced to leave the fibre neutral, not faintly alkaline and tacky. Skip the dwell and the agitation and you’ve skipped most of what separates a clean from a wetting.

What does the person holding the wand know?

A machine has no judgement. Every good decision in a carpet clean is made by the person, and that’s the part no rental includes in the price.

The machine has no idea what it’s cleaning

The rental will run the same soap and the same single pass over a tough nylon and a delicate wool alike, or over a colour that’s going to bleed the moment it gets wet, because it can’t tell them apart and neither, often, can the person pushing it. A professional reads the fibre before switching anything on and tests a hidden corner of anything old or coloured for a dye that will run. They also know that a hessian-backed rug soaked through by an over-eager rental will cockle and shrink as it dries. Judgement is the thing you’re hiring, as much as horsepower.

The judgement shows up in the small forks a machine can’t see. A greasy mark wants a solvent and a muddy one wants an alkaline pre-spray; treat the one as the other and you set the stain instead of lifting it. Old pet urine needs an enzyme and a rethink, because water alone spreads the salts and brings the smell roaring back a fortnight later. Some things shouldn’t be wet-cleaned at all, and that’s a call the rental can’t make, because it knows one setting only: on.

I once collected a small wool rug from a maisonette in Shepherd’s Bush that the owner had run through a rented machine on the living-room floor. The dyes had never been tested and the rug had been drenched, and a deep red border had bled a soft pink halo into the cream ground as it lay there wet. That damage doesn’t come out. The machine did precisely what it was told; nobody told it the red was loose.

So when is the Rug Doctor the right call?

I’m not going to pretend the rental is useless, because it isn’t, and you’d stop trusting me the moment I did.

Rent it for a freshen-up, ring someone for a rescue

For a light maintenance clean on a synthetic carpet in decent nick – a bit of general dulling, nothing set in, no wool or antique rug in the mix – it’s a fair shout. Rent it, go easy on the solution, do slow passes with the spray off to drag as much water back out as the motor will manage, and get the windows open and the heating on so it dries fast. With restraint, on the right carpet, it’ll freshen a room up perfectly well for the money.

And add the rental up properly before you decide. By the time you’ve added the day’s hire, the bottle of solution, the tank of your own hot water, an evening of shoving a heavy machine up and down the stairs, and the grey waste water to pour away afterwards, the gap to a professional’s quote is narrower than the shelf price makes it look.

The false economy is renting it for a rescue. A heavily soiled carpet, a wool one, an old rug, or a set-in stain – pet urine worst of all – is beyond what the machine can do, and running it over them first tends to add a step rather than save one. You spend the day and the rental fee for a poor result, then ring a professional anyway, who now has a soaked, over-soaped carpet to sort out before the real work can even start. Cheap twice is dearer than dear once. The red machine will freshen a tired synthetic on a Sunday afternoon; it will not save a wet, bled wool rug, and it will happily help you ruin one.

Is Your Carpet Safe for Your Baby That Has Just Started to Crawl

0 commentsCarpet mentor says

The short answer, before you spiral: yes, almost certainly, as long as the carpet is clean. A crawling baby on a well-kept carpet is fine, and in a few ways better off than one skidding about on laminate. The worry I hear at doorsteps most weeks – that carpet is somehow a hazard for a baby – gets it backwards. A clean carpet is fine. A neglected one is the thing to sort out, and it sorts out easily.

What’s changed is your baby, not the floor. Somewhere in the back half of the first year they stop being a bundle you carry and become a small person who lives down on the ground, and the carpet turns into the most important surface in the house overnight.

What changes the day your baby starts crawling?

Up to now the carpet has been scenery. Your baby was held, or parked on a playmat, kept at arm’s length from the fibres. A crawler ends that. They crawl across it, press their face into it, and post whatever they find on it straight into their mouth – all at pile level, nose an inch or two off the surface, breathing in whatever the pile gives back.

Everything is at pile level now

An adult meets the carpet through the soles of their feet. A baby meets it with their whole body – knees and palms, cheek and open mouth. Whatever has settled down at pile level, a crawler is the first member of the household to get properly acquainted with it. This is worth a bit of attention, not a bit of panic. A baby meeting a bit of ordinary household life on the floor is doing something normal, and there’s no need to sterilise the room or scrub the poor child raw every time it touches the carpet. The surface they’re now living on should be one you’ve cleaned properly, rather than one that’s been quietly collecting since you moved in.

What’s living down in the pile?

A carpet is a filter that never gets changed. It holds on to a fair bit that a baby now has its face in, and most of it is invisible from standing height. The good news is that everything in this section responds to a proper clean; none of it is a reason to tear the floor up.

Dust mites and what the shoes bring in

Dust mites are the main one. They’re microscopic, and they live on the skin flakes we all shed, deep in the warm of the pile; it’s their droppings, not the mites themselves, that carry the allergen setting off sensitive little airways. That matters most for a baby prone to eczema or wheeze, and if that’s your family it’s worth a word with your health visitor rather than mine. Pet dander and pollen settle in alongside them, tracked in on coats and paws and drifting down to the one place nobody wipes. Then there’s the walked-in stuff. Whatever coats a London pavement – fox mess, cold chip fat – rides in on shoe soles and gets ground into the pile right by the front door, which is often exactly where the baby ends up. Every hand-to-mouth trip a crawler makes carries a little of that off the fibres and into them. A shoes-off rule at the threshold is the cheapest thing you will ever do for that carpet, and it keeps most of the street out of the room your child crawls in.

Is the cleaning itself a risk?

Here is the part that surprises people, and the part I care most about as someone who does this for a living. The cleaning can be the hazard. A carpet that’s been cleaned badly is worse under a baby than one that was left dirty.

Why a badly cleaned carpet is worse than a dirty one

When a carpet is over-shampooed, or done with a cheap high-detergent product and not rinsed out, the soap doesn’t vanish. It dries into a sticky residue sitting down in the pile, and it does two things: it grabs dirt out of the air so the carpet re-soils fast, and it puts a film of dried chemical exactly where your baby’s hands and cheek now spend their day. A dirty carpet holds dirt you can lift. A badly cleaned one holds a chemical you have to clean twice to remove. You can usually spot it: a carpet that goes grubby again within a fortnight of a clean is telling you the soap was never rinsed out, and it’s pulling fresh dirt down to the exact spot the baby sits.

So the way it’s cleaned matters more than whether it’s cleaned. What you want is a proper hot-water clean that rinses the detergent back out and pulls it out again with the soil, then dries fast – a day or so, not a carpet left damp and heavy to grow mould in the base. Time it so the pile is bone dry and aired before the baby’s back down on it. Plenty of families book exactly this deep clean in the weeks before the baby’s mobile, which is good sense; a floor that hasn’t been touched since the last tenant is not the floor you want a first crawl on. Between the deep cleans, a vacuum with a filter that traps the fine stuff instead of puffing it back into the room does more than any spray, and it does most for the dust-mite problem when you take it slowly enough to pull it out of the pile rather than skim the top.

And leave the aerosols in the cupboard. The “antibacterial” and “nursery fresh” carpet sprays are the last thing you want down where the baby breathes – you’d be laying a fresh chemical and a synthetic fragrance precisely there, to deal with a bit of dirt that a real clean would have taken out anyway. Nothing with bleach or ammonia in it belongs on a floor a baby crawls on, whatever the label promises. For the small, inevitable spills – milk, mashed banana, the rest of it – blot with warm water and a clean cloth and rinse the spot, and keep the clever products well away.

A young family off Northcote Road in Clapham had me out for this exact worry. New baby – their first – and they’d panic-cleaned the front room themselves the week before, with a hired machine and a strong supermarket solution they never rinsed out, and the carpet had dried tacky and reeking of chemical fake-flowers. The baby was due on that floor within days. What they’d meant as a deep clean had left a residue I had to extract twice with plain water to shift. They’d have been better off doing nothing and letting me at it fresh.

Should you worry about new carpet and that new-carpet smell?

This is the one genuine carpet-as-object risk, and it’s worth knowing about if you’ve just fitted a nursery.

Airing it out before the baby’s on the floor

That distinctive new-carpet smell is not a sign of freshness. It’s the carpet, the underlay and the adhesives releasing volatile compounds into the room – off-gassing, some of it formaldehyde – and it carries on for a good while after the fitters have packed up. A new-build or a freshly carpeted nursery is where this bites, because the room is often sealed up and unused, concentrating the very air the baby will soon be breathing down there. The soft synthetic underlay and the glue holding everything to the gripper are as much of the source as the carpet on top, which is why airing the room properly beats any amount of surface spraying. Give a new carpet a proper airing and some real time before the baby lives on it – weeks with the windows open rather than an afternoon. If you’re choosing carpet for a nursery and you’ve the option, the low-emission ranges and natural untreated wool off-gas far less than cheap synthetics; ask the retailer directly, because the good ones can show you the certification and the poor ones will change the subject. An older carpet that’s been down a few years has done nearly all its off-gassing already, which is one more reason the well-vacuumed carpet you’ve had for ages tends to be the safer one under a baby than a shiny new fit.

When should you get down on the floor yourself?

You will learn more about your own carpet in one minute at the baby’s level than in a year of looking at it from five foot up.

The hands-and-knees test

Get down on your hands and knees in the middle of the room where the baby spends its day, and give the carpet a proper look and a proper sniff. A musty smell low down means damp, and damp means mould building in the base – a real concern on a ground floor, over a concrete slab, or anywhere that’s flooded or been over-wet in a past clean. I pulled up a corner of carpet in a ground-floor flat in Bow once for a couple expecting their first, and the underlay beneath was black with mould they’d never smelled from the sofa. That’s a job for lifting and drying out, not spraying over.

While you’re down there, a word on the thing plenty of new parents do out of pure love and later regret: ripping up a sound carpet to lay laminate “for the baby.” It’s usually a downgrade. A clean carpet cushions the head-first tumbles a new walker is guaranteed to take and gives small hands some grip; laminate hands you a hard, cold, slippery surface and a lot of bumped skulls. Sort the carpet out, and let the baby have something soft to land on. Then get back down there a week later, once it’s clean and dry, and put your own face near the pile the way they will – if it smells of nothing and feels dry against your cheek, that’s your answer.

a large, hand-woven antique Persian rug with an intricate floral medallion pattern in a a spacious, elegant salon inside an upscale Victorian London townhouse

How To Clean an Antique Persian Rug Without Damaging the Dyes

0 commentsCarpet mentor says

There’s a particular flavour of dread that comes with a real antique Persian rug and a knocked-over glass of red. I’ve watched grown adults stand frozen over one, too scared to touch it, and they’re right to be scared. A fitted carpet you can pull up and replace. A hand-knotted rug that has already outlived three owners you cannot.

Most of the safe work on an old rug carries no risk to the colours at all – it’s the dry work, and you should be doing more of it. The dangerous work is a smaller slice than people fear, and almost all of it comes down to water.

How do you know what you’re dealing with?

Before anything, work out what’s on your floor, because the advice splits hard between a true antique and a machine-made lookalike. A genuine old Persian is hand-spun wool, dyes boiled from madder root and indigo, and knots tied by hands that have been a century in the ground. A modern reproduction is uniform and machine-set, often backed with latex – and you can scrub that far harder without a second thought.

Reading the back, and why the reds are the ones to fear

Turn it over. On a hand-knotted piece the pattern reads clearly on the reverse and the knots sit with the small irregularities of human work; a machine-made rug shows a flat, even back, sometimes a printed grid or a rubbery coating. Once you know it’s the real thing, the colour to watch is red. The early synthetic reds that turned up in Persian weaving over a century ago were notorious bleeders, and a fugitive red sitting against an ivory field is the single most common way an old rug gets ruined in a bath. Dark indigo can crock and move as well. Once a bad red walks into a cream ground, gone is gone – no cleaner alive puts it back. Silk gives itself away too, by its sheen and its fineness; it catches the light differently as you move round the rug, and the knots are impossibly small. A piece with silk highlights, or a whole silk field, is out of home-cleaning territory before you’ve filled a bucket.

Why does testing the dyes come before anything else?

Because every other decision hangs off the answer. Wet a rug whose dyes aren’t fast and the colours creep into each other along every border, and the rug is ruined.

The damp white cloth on a hidden corner

The test takes two minutes and it’s the most important two minutes of the whole job. Dampen a clean white cloth with cool water – wrung out, not dripping – and press it firmly onto each colour in turn, working in a corner or an edge where a mistake won’t show. Give the reds and the dark blues real attention, hold the cloth down for a good few seconds, then look at it. Any colour on the cloth means that dye is loose, and a loose dye means no water, no shampoo of any kind until a specialist has seen it. A clean cloth across every colour is your green light, and even then you go gently. Too many people skip this and learn the hard way: if you haven’t done the cloth test, you don’t yet know whether you’re allowed to wash the rug, and guessing is how gone-is-gone starts.

What does the cleaning itself look like?

The cleaning people are frightened of is the cleaning that barely matters, and the cleaning they skip is the cleaning that saves rugs.

An old rug is a sponge for dry grit. Years of it work down through the pile to the foundation, and every time someone walks across the rug that grit saws at the base of the wool and the cotton warps holding everything together. Get that grit out and you’ve done more for the rug’s life than any wash could, at zero risk to the dyes.

Getting the grit out before a drop of water goes near it

So start dry, and be patient about it. Vacuum with suction only – no rotating brush bar, which chews the pile and drags at the fringe – and go over the back as well as the front, because tapping the grit down from behind loosens what the pile is gripping. Better still, on a dry day, drape it face-down over a washing line and give the back a steady beating with a flat implement; the amount of soil that falls out of a rug nobody thought was dirty will alarm you. Do this properly and you’ve done most of the honest work already.

If the dyes passed the cloth test and the rug will take a wash, keep it cold and keep it mild. Cool water, never hot – heat is what sets a stain and loosens a dye in the same motion – and a pH-neutral shampoo made for wool or rugs, with nothing that carries oxygen bleach or lives under your kitchen sink. Work a gentle foam into the pile in the direction it lies, and don’t flood it; the pile is what wants cleaning, and the foundation should stay as dry as you can keep it. Then rinse, and rinse again, because shampoo left behind turns into a grey dirt-magnet within weeks.

For a fresh spill – the dropped glass of red that started all this – the rules are the same, only faster. Blot, don’t rub, with a clean white cloth and cool water, working from the outside of the mark inward so you’re not spreading it wider. On a rug whose dyes you haven’t tested, keep even that to the barest dab; a spill you blot too eagerly on a fugitive dye does the bleeding for you.

The trade half-shares this and half-won’t say it to a customer: dirt has destroyed far more old rugs than water ever has. The dealer who tells you a Persian should never be washed is guarding himself against blame, not guarding your rug – a rug caked in a decade of grit is quietly rotting from the base while it looks merely dusty on top. And keep the rotary machines and the hot-water extraction wands well away from a genuine antique; those are tools for fitted synthetic carpet, and on hand-knotted wool they crush the pile and force water into a foundation that then can’t dry.

A job up in Highgate stays with me. Big Victorian villa off Southwood Lane, and the owners had a Tabriz that had been in the wife’s family for generations, laid in a hallway that caught every shoe in the house. They’d been too frightened to do anything to it for years beyond a nervous hoover. When I read the back it was sound, the dyes held on the cloth test, but the grit at the foundation came out in grey drifts – the thing had been slowly grinding itself to death under its own dirt. No stain, no drama. The rug just needed the muck taken out of it before the muck took it apart.

How do you dry it without the colours running?

The drying is where good intentions turn into disasters, because a rug that survived the wash can still bleed on the airer.

Why a slow dry is where rugs go wrong

A wet rug left to dry slowly is a rug inviting trouble. As the water sits and creeps, any dye that’s even slightly loose travels with it, wicking colour from one area into the next long after you’ve finished cleaning. The cotton foundation, kept damp for days, starts to rot and smell. Mildew blooms in the pile. Get it dry fast and get it dry flat, with plenty of air moving over both sides and a fan if you have one. A rug should be dry in a day or two with air moving on it, not sitting heavy and damp for a week. Keep it out of direct sunlight, which fades old dyes as surely as any spill. Don’t sling a soaked rug over a bannister or a line; a heavy waterlogged rug hung by one edge distorts its own shape and can crack the foundation under its weight. Lay it flat and raise it on something so air reaches underneath. Keep it moving towards dry.

I once collected a small silk-and-wool piece from a flat in Pimlico that a previous owner had washed and then left rolled up damp in a cupboard for a fortnight. The smell reached me before the rug did. Half the blues had migrated into the pale ground and the foundation had gone soft with rot, and gone is gone – there was no rescuing the colours that had moved. A good wash undone entirely by a bad dry.

When should you stop and call a specialist?

There’s a clear line here, and standing on the wrong side of it with a bucket is how good rugs die.

The wash pit, not a steam machine in your living room

Hand it over the moment any of these is true: the rug is silk or has silk highlights, a colour failed the cloth test, the mark is old pet urine, or the rug has been through a flood. Urine especially – it burns dye and browns wool as it dries, and by the time the brown shows itself on the surface the chemistry underneath has already happened. A specialist washes the whole rug flat in a controlled pit, with the water and the drying properly managed, the way these pieces were meant to be cleaned. That is the safe deep clean. A domestic steam machine dragged into your living room is its opposite.

Leave the fringe alone – people damage it out of good intentions. Those tassels are structural, the ends of the warps the whole rug is knotted onto, and the cleaners who bleach them bright white to make a rug “pop” are quietly damaging the very threads that hold it together. A wide-toothed comb, worked slowly from the base of the tassels outward, is the whole of it.

Is Carpet Protector (Scotchgard) A Marketing Hoax Or Worth Paying For

0 commentsCarpet mentor says

Every cleaner in London gets the same question at the door, usually while I’m coiling the hose back onto the machine. “Do you do the Scotchgard while you’re here? Is it worth it?” There’s a version of the same careful shrug ready in most of us, because the honest answer irritates the customer who wants a flat yes and the one who wants a flat no in more or less equal measure.

So here’s mine, worked out over years of applying the stuff, refusing to apply it, and cleaning carpets that were “protected” and stained anyway.

It works. It’s also sold to plenty of people who’ll never get a penny of value from it. Both things are true at once, and the trick is knowing which house you’re standing in.

What does carpet protector do to the fibres?

Strip away the brand name and carpet protector is a coating you spray onto the pile that changes how the surface behaves toward liquid. Bare carpet fibre is thirsty. A spill spreads out and wets down to the base, and the pigment in it settles where you can’t reach. A treated fibre has a skin over it that lifts the surface tension, so a drop of water or wine sits up as a bead for a while instead of sinking straight in.

That’s the whole magic, and it’s smaller than the adverts suggest. All the coating does is buy you a head start – thirty seconds, sometimes a minute or two if you’re quick – between the spill landing and the spill becoming a stain. Blot inside that window and you’ve won. Leave it, and the bead eventually loses and soaks in like it would on any other carpet.

The invisible coat that raises the surface tension

The old versions of this chemistry were the fluorochemical treatments that got a bad name as “forever chemicals,” and the big brands reformulated after the fuss, with the consumer products moving off that stuff entirely. Here’s the part the reps won’t lead with: the reformulated coatings don’t grab oil the way the originals did. Water beading is easy, and the newer sprays still do that well. Oil and grease – trodden-in chip fat, or the film that shoe soles leave – is a harder ask, and the current formulas are weaker at it than the ones your nan swore by. Anyone who tells you performance is identical to the old days is reading from a script.

The safety question comes up on nearly every doorstep, usually phrased as “is it alright round the baby and the dog?” The reformulated consumer coatings have moved off the chemistry that caused the worry, and once the spray has dried and cured it’s an inert film sitting in the pile rather than a wet chemical anyone’s breathing in. I still air the room out and keep pets off it until it’s bone dry, which is common sense more than caution.

So is it a hoax, or does it earn its keep?

To call it a hoax is lazy. The coating does a real, measurable thing – I’ve watched water bead on a treated stair and soak into the untreated one beside it, same carpet, same jug. The head start is genuine.

The hoax, where there is one, lives in the selling. A protector does not make a carpet stainproof, whatever the doorstep patter implies, and the gap between “resists stains” on the tin and “you can ignore a spill for an hour” in the customer’s head is where all the complaints breed.

What the label promises and what happens on the floor

Most upset about carpet protector traces back to somebody who thought they’d bought a force field. They see the red wine go down. They paid extra to be protected, so off they go to finish their dinner. An hour later the bead has given up and the wine is deep in the pile, and now the protector’s a con as far as they’re concerned. The coating did its job – it bought them the window – and they spent the window eating pudding. Whether the money feels well spent is half about managing what people expect from it.

Where does it earn the money, and where is it wasted?

Most of the money people waste on protector gets wasted right here, so it pays to be honest about the split.

Protector earns its keep on pale carpet in a busy part of the house. A cream hall runner, or a light stair carpet that every muddy schoolboy in the family charges across – that’s the coating doing real work, buying the household enough beading and blot-time to keep an expensive pale carpet decent for an extra year or two between deep cleans. Homes with young kids or a dog benefit most, because those are the homes where something gets spilled on a Tuesday and nobody notices until Friday.

Pale hall runners and stairs, versus the spare room nobody walks through

Now the other side, and I’ll be blunt about it: paying to protect a dark carpet in a low-traffic room is money down the drain. A charcoal berber in a spare bedroom that gets walked on twice a month does not need a coating – it hides marks anyway, and the treatment will have worn off long before it earns out on a carpet nothing ever lands on. I turn this work down more often than I take it, which does me no favours on the invoice.

A job in East Dulwich brings it home. Big four-bed off Lordship Lane, family with three kids under ten and a spaniel, cream wool twist right up the main staircase and across the first-floor landing. They’d had it cleaned and protected the year before by someone else, and it had held up well – you could see the traffic lanes starting to go on the stairs, but the pale wool had shrugged off a lot that would have marked it bare. That’s protector spent in the right place. Same visit, the mum asked me to do the guest room, a little box room with a dark grey carpet nobody used. I talked her out of it. She’d have been paying for a coating on a carpet that faced nothing.

There’s a money argument that settles it more often than any of the rest. Protector is worth paying for when it plausibly delays the day you rip up and replace an expensive carpet. On a pale wool stair that runs to four figures to refit, buying an extra couple of years of decent looks pays for the treatment several times over. On a cheap synthetic you’d replace without a second thought, the sums never land.

Wool and synthetic take the treatment differently. Wool holds a coating well and needs the beading help because it stains readily; a decent polypropylene resists staining somewhat on its own, so the protector adds less on top. The pale wool carpet in the family hallway is the textbook case for paying up. The synthetic in the little-used study, far less so.

Does a bad application make things worse?

It can, and this is the bit that turns a fair-value service into a proper waste. A protector is only ever as good as the state of the carpet when it goes on.

Why spraying it over a dirty carpet seals the grime in

The coating has to go onto a clean, dry carpet. Spray it over a soiled one and you’re sealing the grime in under a layer that then makes the carpet harder to clean properly next time – you’ve locked the dirt beneath the very thing meant to keep dirt out. A rushed job that skips the clean, or lays the spray on in uneven patches, hands you weak protection and a false sense of security into the bargain.

I saw the sealed-in version at a rented flat in Ealing, a landlord’s let between tenants. The previous cleaner had blasted protector over a grubby beige carpet to make the check-out look thorough, with no proper clean first. By the time I got to it the trodden-in soil was locked under the coating and the whole thing had gone a flat, greyish colour that no amount of extraction fully lifted. Worse than if nobody had touched it.

How long does it last, and how do you know it’s gone?

Nothing about this lasts forever, and the coating wears fastest exactly where you most want it – the traffic lanes and the middle of each stair tread where every foot lands.

A professionally applied protector on a moderately used carpet gives you a decent stretch before it needs redoing, well beyond the few months you’d get from a supermarket aerosol you did yourself on a Sunday. A deep clean wears it down too, so it wants topping up after each one rather than being treated as a one-off for the life of the carpet. It goes first on the runways your feet make – the centre of the hall, the turn at the bottom of the stairs – while the edges of the very same carpet can still bead away months after the middle has quietly given up.

The bead test on the top stair

You can check it yourself in ten seconds. Flick a few drops of water onto the carpet in a spot that gets used – the top stair is perfect – and watch what they do. If the drops sit up as beads you can dab away, the coating’s still working. If they flatten and vanish into the pile, the head start’s gone and you’re back to bare fibre. Try it on the top stair and again on a quiet edge of the same carpet, and the difference between the worn lane and the protected edge tells you the whole story of how the treatment ages.

I keep a little spray bottle of plain water in the van for exactly that. Customers believe their own eyes on the bead test in a way they never believe a cleaner’s sales pitch, which is the most honest thing I can tell you about the whole business.

How To Deal with Foundation and Make-Up Stains on a Bedroom Carpet

0 commentsCarpet mentor says

Foundation is one of the worst things that can land on a bedroom carpet, and I say that having lifted more of it out of pale wool than I’d like to count. A dropped compact, or a sponge knocked off the edge of the bed, leaves a mark the size of a fifty-pence piece – and within the hour half the people who ring me have gone at it with a wet flannel. That is usually the point I get the call.

The stain itself is small. The mess from the panic rarely is.

Why does foundation cling to carpet fibres in the first place?

Most people treat foundation like spilt juice, then wonder why water does nothing. It sits differently. It’s pigment, oil, and a film-former built to survive a full working day on skin, which is a design brief almost perfectly wrong for anyone who wants it back off a carpet.

The pigment is the part you can see, and the oil is the part that spreads it. The film-former is the bit that laughs at a splash of water.

The three things in the bottle that fight you

The colour comes from iron oxides and titanium dioxide – fine mineral particles that drop straight down between the fibres and lodge near the base of the pile. Water floats on top and leaves them exactly where they are. Then there’s the emollient, the oily carrier that gives foundation its slip; that’s what smears a neat little dot into a palm-sized smudge the moment someone rubs. Long-wear and so-called transfer-proof formulas add silicone, which is there to shrug off sweat and rain on your face and does the same job on your carpet. None of that dissolves in a splash of water the way a fruit-juice stain does, which is the whole reason a wet flannel makes it worse rather than better – you’re moving the oil around and pressing the mineral colour down into the pile. Judge that against a bottle of red wine, which at least dilutes, and you start to see why foundation is a harder customer than it looks.

What should you do in the first ten minutes?

Speed matters, but the wrong speed makes it worse. The most useful thing you can do is get the excess off the surface before it works its way down – and do it without pressing.

Lift, don’t wipe. A dessert spoon turned on its edge, or a blunt butter knife, will scoop a surprising amount of a fresh blob off the top of the pile. Every wipe at this stage spreads the oil and pushes pigment deeper, so scooping first buys you a smaller problem.

Add water to powder make-up and you make things worse: a dusty mark that would hoover straight out becomes a paste that grips. If what’s landed is a shattered bronzer or a pressed blusher, leave the water well alone and reach for the vacuum. I’ve watched someone take a wet cloth to spilled setting powder and triple the size of the job in ten seconds.

Blot, don’t grind it deeper

Once the excess is off, blotting is the whole technique. White cloth or kitchen roll, pressed down and lifted, working from the outside of the mark towards the middle so you’re not chasing the edges wider. A coloured cloth can bleed its own dye into damp wool, so keep to white. Kitchen roll works if you fold it thick and change it often; a threadbare cloth just smears. And check the colour in daylight, never under the bedside lamp – a warm bulb hides a yellow foundation shadow completely, and you’ll swear you’ve won when you haven’t.

Which household fixes shift it, and which make it worse?

This is where most bedroom carpets get damaged, because the internet is full of confident advice and half of it is wrong. Reach for the mildest thing first and work up only if you need to.

A cup of warm water and a drop of washing-up liquid

Start with the boring option. A cup of warm – not hot – water with a single drop of plain washing-up liquid stirred through it handles a good number of fresh foundation marks on its own. Hot water is the classic mistake here: heat can set certain pigments and, on a wool carpet, encourages the fibres to felt and the backing to give up moisture it shouldn’t. Dip a white cloth and wring it almost dry, then blot. Wring it out and blot again. It’s slow and dull, and it works more often than anything clever.

The rinse matters as much as the clean. Detergent left in the pile turns into a dirt magnet and you get a darker patch a month later, so a final blot with a cloth wrung out in clean water earns its keep every time.

The oily component is what defeats plain detergent, and that’s where a solvent earns its place. Surgical spirit or plain isopropyl alcohol on a cotton pad breaks the emollient and lifts the silicone film that water can’t touch. Dab a hidden patch first – inside a wardrobe, behind the door – and give it a minute, because alcohol can strip colour from some dyed synthetics. Then work the alcohol in tiny amounts onto the mark, pad turned to a clean face every few dabs. You’ll see the pigment start to transfer onto the cotton, and that’s the moment it’s moving.

Lipstick and waterproof mascara are a different animal again – heavy on wax and oil, light on anything water-soluble – so they skip the washing-up-liquid stage and go straight to the alcohol. I pulled a smear of red lipstick out of a bedroom carpet in Kentish Town last spring that had been walked from the bathroom on the sole of a slipper; it wanted three rounds of solvent and a lot of patience, and even then the wax had greyed a faint track that only lifted under a proper hot-water extraction with the machine.

For a stubborn pigment shadow left behind after the oil has gone, an oxygen-based spot cleaner can lift the last of it – but treat wool with suspicion. Oxygen bleach at any real strength will pull colour and rough up wool fibres, and once you’ve bleached a patch of a dyed carpet you own that patch forever. On a hard-wearing polypropylene it’s a fairer bet.

I’ll say what half the trade won’t: the branded “make-up stain removers” on the supermarket shelf are a waste of your money. You’re paying two or three quid for a spray of weak surfactant and a nice label, and washing-up liquid does the same work for pennies. Save the money for the day the DIY doesn’t hold.

A couple of hard nos. Baby wipes leave a residue that attracts dirt and greys the spot within a fortnight. A stiff brush fluffs and splits the pile so the patch never sits the same again. And hold whatever cloth you’re using to the window between dabs – lamplight lies about colour, and you want to see the real state of the transfer.

A job on the Isle of Dogs sticks with me. Two-bed rental in one of the new blocks off Marsh Wall, tenant moving out at the end of the week and terrified about her deposit. Foundation trodden into a cream wool-mix bedroom carpet, right by the built-in wardrobe where she did her face every morning. She’d already had a proper go – hot water and a coloured microfibre, scrubbed as hard as she could manage – so by the time I arrived the original coin-sized mark was a pale saucer-sized halo with a felted middle. The stain came out. The felting and the faint bleached ring from her cloth’s dye did not, and that’s the bit that costs you a deposit, not the foundation.

Does the carpet under you change how you treat it?

It changes everything, and it’s the first thing I check before I put anything wet down.

Wool forgives nothing, polypropylene forgives a lot

Wool is beautiful and temperamental. It hates high heat and strong alkaline cleaners. Over-wet it and dry it too slowly, and it browns – that tea-coloured ring creeping up from the backing is the natural fibre wicking as it dries. Keep the water minimal and dry it fast with a fan or an open window. Blot rather than soak. Synthetic carpet – most bedroom broadloom fitted in London flats over the last twenty years is polypropylene – takes a solvent and a firmer hand far better, though it clings to oily residue and can go grey in a patch if you leave detergent behind without rinsing. Nylon sits somewhere between the two, tougher than wool and fussier than poly about heat.

There’s a reason I ask what’s underfoot before I quote. The same foundation mark is a ten-minute job on a synthetic carpet and a careful half-hour on wool, and treating the second like the first is how people end up with a browning ring worse than the stain they started with.

I’ll say it plainly: fitting a pale wool carpet in a bedroom where someone sits at a dressing table every day is a decision you’ll regret, and no amount of care changes that. Lovely for a year, a map of every dropped sponge by year three.

When is it worth stopping and calling someone in?

There’s a point where carrying on does more harm than the original spill, and knowing where that line sits saves carpets.

The halo and the shadow that won’t lift

If you’ve been at a mark for twenty minutes and it’s stopped shifting, stop. Past that point you’re wetting the backing and spreading the edges, risking a browning ring on wool for no further gain. Set foundation – a spill that dried in days ago and had heat put through it – has usually bonded pigment into the fibre in a way home kit won’t reverse. A halo of your own making, where the cleaning’s lifted a circle of soil around the stain, tells you the same thing. And a valuable rug, a silk or a hand-knotted wool, is never the place to experiment; the dyes and the foundation react in ways you can’t predict on a kitchen table.

I keep a torch in the van for exactly this. You lay it flat against the pile and rake the light across, and the ghost of an old make-up mark shows up grey where the fibres sit differently, long after it’s stopped looking like a stain in daylight. Once you’ve seen a carpet that way you can’t unsee it.

Proactive Tips to Stop Carpet Stains Before They Set In

0 commentsCarpet mentor says

Are you tired of constantly battling stubborn carpet stains? Today, we will explain the different types of carpet stains and how they form, as well as proactive measures you can take to prevent them from setting in.

We’ve got your back with regular cleaning and maintenance tips and protective measures to keep those stains at bay. We’ll also chat about effective cleaning techniques for common stains and provide quick and easy solutions for emergency stain removal. And if all else fails, we’ll explore when it’s time to bring in the pros for stain removal services.

Stay tuned for expert advice on keeping your carpets looking pristine.

Understanding Carpet Stains

Understanding Carpet Stains

Understanding how different stains behave is crucial to effectively removing stains and keeping your carpet looking its best. When you can identify and categorise stains, you’re better equipped to choose the proper cleaning method and prevent further damage to your carpet fibres.

For instance, water-based stains like juice or wine tend to seep deep into the carpet, potentially distorting its colour if not promptly addressed. On the other hand, oil-based stains from food or grease can leave behind a sticky residue that attracts dirt, resulting in a dull appearance over time. Organic stains, such as those from pet accidents or mould growth, not only compromise the cleanliness of your carpet but can also emit unpleasant odours if left untreated.

Types of Stains and How They Form

Understanding the types of stains and how they form can help you implement effective prevention strategies to keep your carpets looking top-notch. Each carpet fibre reacts differently to stains, so treating them with stain-resistant solutions can give you an extra layer of defence against spills and discolouration.

Water-based stains are usually easier to remove from carpet fibres than oil-based ones since they don’t soak in as deeply. Oil-based stains might need some fancy cleaning solutions to get rid of them for good. Colour stains, like those from dyes or drinks, can be a real headache to eliminate and might leave behind stubborn discolouration if you don’t tackle them immediately.

Stain-resistant treatments form a shield on your carpet fibres, making it simpler to wipe away spills before they sink in. Regular vacuuming and quick spot cleaning are essential to maintain carpets’ appearance and lifespan.

Proactive Measures to Prevent Stains

To keep your carpets looking their best and lasting longer, take proactive steps to prevent stains. Clean and maintain them regularly, use protective measures, and act fast when spills happen to lower the chances of stubborn stains setting in.

When you vacuum your carpets often, you prevent dirt and debris from getting comfortable and embedding themselves in the fibres. Don’t forget to tackle spills immediately to prevent liquids from leaving a home deep in the carpet and causing a stain. Applying protective coatings like stain repellents creates a shield that fights off stains and makes clean-up a breeze.

So, if you want to keep your carpets looking pristine for years, these proactive strategies are your ticket to success.

Regular Cleaning and Maintenance

Maintaining a routine of regular cleaning and maintenance for your carpets is crucial to preventing stains and ensuring they last. Vacuum regularlydeep clean when needed, and gentle cleaners keep those carpet fibres looking their best.

You must keep hoovering to get rid of dirt, dust, and other gunk that’s settled into your carpet. This makes your carpet look better and improves the air quality in your space by reducing allergens.

Sometimes, even with regular hoovering, you must dive deep to tackle stubborn stains and smells. Deep cleaning removes the dirt and grime that your hoover might miss, thoroughly refreshing your carpet.

When picking out cleaners, always consider what carpet you have to avoid mishaps. What works for wool might not be the best for synthetic fibres. Test out a small, hidden spot first to ensure the cleaner won’t cause any damage before using it on the entire carpet.

Using Protective Measures

To enhance the stain resistance of your carpets, consider implementing protective measures like stain guards, coatings, and preventative maintenance. These steps create a barrier against spills and stains, making cleaning a breeze and more effective.

Applying a quality stain guard is a proactive way to shield your carpets from accidental spills. This ensures that liquids bead up on the surface instead of seeping into the fibres, reducing the chances of permanent stains and simplifying the cleaning process.

Opting for protective coatings adds an extra layer of defence, helping to extend the lifespan of your carpets by preventing wear and tear. Regular vacuuming and prompt spills blotting are crucial parts of preventative maintenance to keep your carpets looking fresh and vibrant.

Dealing with Common Stains

Knowing how to deal with common stains on your carpets effectively is crucial for maintaining their appearance and cleanliness. You can tackle those pesky stains by using home remedies and following the proper stain removal techniques to remove them without damaging the carpet fibres.

Let’s talk about coffee spills—they can be a real pain if not handled quickly. To tackle this tough stain:

  1. Start by blotting up as much of the spill as possible with a clean cloth.
  2. Mix equal vinegar and water to create a solution and gently dab it onto the stained area.
  3. Let it sit for a few minutes before rinsing it with cold water and drying it by blotting.

This method is excellent for breaking down the coffee residue without leaving ugly marks on your carpet.

Effective Cleaning Techniques

When dealing with stubborn carpet stains, it’s essential to use effective cleaning techniques, such as blotting with absorbent materials and turning to natural solutions such as vinegar. These methods are gentle on carpet fibres while thoroughly removing those pesky stains.

Blot any stains right away with absorbent materials. This step is crucial to prevent the stain from spreading and getting deeper into the carpet fibres. Acting quickly can help prevent the stain from setting in and becoming a real pain to remove.

Consider using vinegar solutions as they are effective and environmentally friendly. This makes vinegar a great option for anyone embracing sustainable cleaning practices. Thanks to its natural acidic properties, vinegar can tackle various types of stains, from food spills to pet accidents, breaking them down efficiently for easier removal.

Quick and Easy Solutions

Regarding emergency stain removal, you want to act quickly using things you already have at home and eco-friendly cleaners to protect your carpet from lasting damage. Make sure you have a spill kit ready with all the cleaning essentials to assist you in removing stains promptly. Items like bicarbonate of soda, white vinegar, and washing-up liquid are essential for dealing with various stains.

For example, if you spill something, sprinkle soda to absorb the excess liquid before gently patting the area with water and white vinegar. Wash-up liquid and warm water can work wonders for tough, greasy stains. Remember that the key is speed—the sooner you act, the simpler it is to eliminate that stain before it becomes a permanent blemish.

Professional Stain Removal Services

Consider professional stain removal services for those tough stains or delicate upholstery fabrics that need special care. DIY solutions can handle minor stains, but pros have the skills and tools to deal with more stubborn spots. Professional cleaners use high-tech cleaning products to tackle various stains without harming delicate fabrics. They undergo extensive training to grasp the science behind stains and fabrics, guaranteeing adequate and safe cleaning. If you’re facing tricky stains like ink, wine, or pet messes on your upholstery, reaching out to professionals can stop any additional damage and extend the life of your furniture.

When to Seek Professional Help

Knowing when to seek professional help for stain removal is crucial, especially for those stubborn stains that won’t shift with your usual tricks. Professionals have all the fancy tools, top-notch products, and magic stain repellents to ensure your carpets get the deep clean they need.

If you’re scrubbing away but the stains on your carpets or furniture won’t disappear, it might be time to call the experts. Experienced pros don’t just deal with surface stains; they delve deep to eliminate allergens, dust mites, and bacteria hidden within the fibres.

Investing in stain-repellent treatments is like providing your furniture with a protective barrier against future spills, keeping it looking fresh for longer. When selecting a cleaning service, ensure you opt for trusted professionals who are knowledgeable and use safe, effective methods for the optimum results.

Emergency Stain Removal

You need a solid emergency stain removal plan to keep your carpets looking fresh. Be prepared with a spill kit and know how to handle different spills, like liquid and oil-based stains, to save your carpets from lasting damage.

Your spill kit should have key essentials like absorbent materials (think kitchen paper or clean cloths), a mild liquid detergent or specialised stain remover for oil-based stains, and don’t forget gloves to protect your hands during the cleaning process.

When dealing with liquid spills, your best bet is to dab the area with absorbent materials to soak up the liquid without rubbing, which could worsen the stain. For oil-based stains, scrape off any excess gently and then apply the appropriate cleaner following the instructions to the letter for the best chance at effective removal.

A Waste Of Good Wine – How to Clean Stains From Carpet

0 commentsCarpet mentor says

People Standing on Carpet With Red Wine Stains
Image created by Magda Wojtyra

One of the unfortunate things that happen at wine tastings, apart from encountering wine that hasn’t been treated with the respect that it deserves, is that some wine inevitably ends up getting spilt. This is worse than just wasting a good wine – although some connoisseurs may well say that this is a worthy fate for a bad one. It’s also bad for the carpets if the wine in question is a red of some kind or even a rosé. This is because red wine is notorious for staining fibres of any type.

We will assume that your wine-tasting sessions have come some way from the symposia of Classical Greece (yes, a symposium was originally a wine-tasting and drinking session). Here, I’m not referring to the quality of your discussions, even though I doubt you have high-powered philosophers like Plato and Socrates attending. Instead, I’m referring to two habits that would have been tough on any carpets (which presumably were Persian or Turkish). The first was the practice of pouring out libations or drink offerings on the ground for the ancestors or the wine god Dionysius. The second was the popular drinking game kottabos, which involved flinging the dregs of your wine glass (or cup, in their case) at a target. One can imagine the mess that the slaves had to clean up (because, ahem, they didn’t have effective carpet cleaning methods back then, didn’t they?). But what can you expect from people who thought that the best way to drink wine was to water it down and/or add seawater or pine resin to improve the flavour?

Even without the messy games of the ancient Greeks, what happens to carpets is bad enough, so knowing how to remove red wine stains from carpets is important if you’re the host.

How Not To Remove A Wine Stain From Carpet

You may take your wine seriously, but even so, there is no need to go to the extremes dictated by some of the more formal and traditional churches in the case of communion wine from Mass being spilt on the carpets. If consecrated wine fell on the carpets courtesy of a clumsy altar boy, then the correct “cleaning” procedure was to cut out the affected part of the carpet and burn it so that it didn’t need to be profaned with something as mundane as scrubbing brushes and water.

Neither do you need to follow the common advice that if red wine is spilt on the carpet, the best thing to remove it is to splash on some white wine. That really is a waste of wine, not just because of the original spill but because following it with white wine is unnecessary. It is true that adding another liquid to flush the red wine out of the carpet fibres and stop it from drying is a good way to prevent a stain. However, you can keep that nice Sav Blanc in the bottle, as other clear liquids will do the job, preferably club soda or ordinary water.

All right, so what should happen if wine is spilt on the carpet? There you are, savouring a good pinot noir, when someone steps backwards, jostling your elbow and sending half of the contents of your glass downwards. It narrowly misses your trousers or skirt, but it lands on the carpet. You accept the apologies of the clumsy jostler, along with the offer of another glass, but then what do you do?

Image created by Dennis Jarvis

Removing Wine Stains

The important thing is to act quickly. If red wine spills onto the carpet and dries, the stain can become just about permanent, or at least becomes a lot more difficult to remove, even by an expert. Your goal in dealing with that spilt pinot noir is to prevent the carpet fibres or, worse still, the backing from absorbing the wine, because once it’s in, it’s a lot harder to get out. By the way, the techniques for getting red wine out of carpets apply to all varieties, not just Pinot Noir. They also work just as well for Shiraz, Cabernet Sauvignon, Merlot and all the rest of them, including classics like port and claret. The techniques also work if the wine has not fallen on the carpet but onto the upholstery.

The easiest way to prevent the wine from soaking into the fibres of the carpet is to add something that will either absorb the red wine more quickly than the carpet does or something else that will be absorbed by the fibres because if the carpet fibres are already full of something other than red wine, they can’t take in any more. They know their limits, unlike some people I can name! Ideally, you should do both, although there is no product that will do both at once.

The first step is to add a clear liquid like water or club soda (please don’t use the chardonnay for this unless you absolutely have no other choice). Plain water is usually available. Club soda also works very well. In fact, professional carpet cleaners use club soda as the moistening agent when they apply the bonnet buffing technique. Use enough water to cover the spot but not enough to spread the spill elsewhere, or the problem will become much worse.

The next step is to blot up the mixture of wine and water (or soda). For this, use a tissue or a paper towel or something that won’t matter if it gets a little stained as a result – maybe a paper napkin from the table where the nibbles are being offered? Your host (or you, if you are the host) may have an old towel handy. Just make sure that it’s very absorbent, as it will be competing with the natural jute backing of the carpet for the liquid down there. You may need to use more than one towel or paper towel, depending on how much wine was originally spilt and how much water or club soda you added.

When you have blotted up enough to leave the carpet fibres only a little damp, there’s another old trick that you can apply: adding salt. Salt is super absorbent and will draw out any liquid that has managed to enter the carpet fibres. The salt will need to sit on that patch of carpet for a while to do its job. After that, it should be swept up and disposed of. It shouldn’t be vacuumed up, as the salt can wreak havoc on the metal bits of your vacuum cleaner – and all vacuum cleaners have them.
Getting Professional Help

Image created by Jennifer Kramer

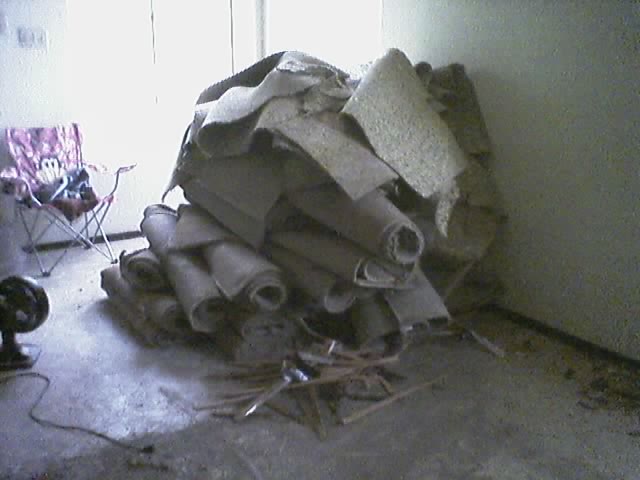
After you have done what you can to remove the wine stain, there may be some left behind. This is where you need to call in the services of a professional carpet cleaner who has all the tools and chemicals, and techniques needed to get out that stubborn bit of pinot noir. Unless, of course, you don’t want to throw your stained carpet away, right on the pile of discarded carpets around the rubbish containers (see photo above).

In general, you will only need to get your carpet spot-cleaned (spot treatment), which involves getting just one or two stains out. However, if the do was a bit more lively and started straying into Ancient Greek symposium territory (in terms of the wine going everywhere, not the addition of seawater to what you drank), then you may need to get the professional to clean more of your carpet (i.e. the whole thing). It really is worth it, as booking a professional carpet cleaning session is a lot cheaper than replacing the entire carpet (or lounge suite or whatever it was that the Pinot Noir fell onto). A good professional will be able to apply a range of techniques to remove stains from delicate items like heirloom rugs or hides as well as your good old standard carpet, so there’s no need to despair if you discover wine stains on one of these.

However, don’t procrastinate, as the longer red wine sits in carpet fibres, the tougher it is to get out. As the Romans (who were even messier than the Greeks at wine-drinking dos) would say, carpe diem (seize the day)!

What to Consider When Hiring a Carpet Cleaner

0 commentsCarpet mentor says

Hey guys, your carpet cleaning mentor Gustavo is here.

I know that some of you provide cleaning services, and some of you purchase said services (either for your home or your company).

So, let me speak about the situation when people book carpet cleaners. What do they know? What do they need? If I can put it this way, a bit of perspective from the customer’s point of view.

OK, here goes my advice to potential customers.

There are different carpet designs and textures. Some of them are expensive and hand-made with flawless skills and tools. Others are cheap, mass-produced, and easy to make. Different materials are used in the manufacturing process of synthetic and natural materials. Both types, however, need regular cleaning. An important thing to note here is that the wrong/unsuitable product or technique may damage your beautiful carpet or rug.

Typically, there are two major carpet cleaning methods. These are wet and dry cleaning techniques. The first one, also called hot water extraction cleaning, is the most widely used, mainly due to the superior results. Dry cleaning is used when your carpet fibers cannot take excessive amounts of water i.e., wool, sisal, seagrass, jute, etc. This method is also called low moisture cleaning. It uses encapsulation carpet cleaning method. Due to the lack of water, this carpet cleaning method does not achieve great results with hard-to-remove stains.

Stains are the main reason carpet owners look to carpet cleaners for help. While most stains can be removed if wiped clean immediately, some of the more stubborn stains need professional cleaning services.

Professional cleaners know which cleaning products to use on the carpet to remove the stain without hampering the carpet much. Too harsh cleaning products only wear out the carpet.

Most people are apprehensive about hiring carpet technicians to clean their carpets as they think hiring them is a waste of money. However, little do they know that periodical cleaning of carpets by professional prolong their life and thus saves the need to spend money to buy a new carpet to replace a worn-out carpet.

So while regular vacuuming of the carpet and immediate removal of stains can keep your carpet clean, it’s always better to hire professional cleaners who use the right equipment and cleaning products to clean your carpet.

In London, carpet cleaning prices vary greatly from one company to another. Moreover, there seems to be no consistent cost system for these companies. Some charge by square footage, some by room, while others seem to charge higher prices. Winters are quite slow months for carpet cleaners in London businesses, implying that it’s the best time to look around for good deals.

Most companies will send free advice via email or even over the phone. This is the best way to ensure you avoid invisible charges or expenses, and you can evaluate what they offer without wasting too much time and money. However, you should not choose a company just because it is the cheapest, quality matters as well.

Most professional cleaners post images on social media (Instagram, Facebook, TikTok) to showcase the concept of their company’s performance. This is a great way of figuring out who they are and what they can do with their cleaning wands and portable extractor machines. On top of that, you will be able to compare the quality of work provided by different companies. When you find the right carpet cleaners, what’s even better is to contact them and find out whether they are insured for public liability.

Which Floor Covering Type Is The Best?

0 commentsCarpet mentor says

Choosing the floor covering types of your home is one of the most important long-term decisions you will do when you move in or re-decorate your residence. It is an expression of your tastes and preferences, but beyond the emotional pick, you should also consider the practical dimensions of the selection. Which of the floor covering types requires the most upkeep? Which one is likely to last longer without repairs? Should you make a uniform choice for the whole place or go room by room? 

Before I share my thoughts, a quick disclaimer – they are entirely based on practical, not esthetical considerations. I have been into the carpet cleaning industry for almost two decades and have treated hundreds of home and office floors of various types. My personal preference is for the convenient and comfortable rather than the beautiful – the latter is entirely subjective anyway. First, I will make a quick commentary on the most common floor covering types and then share my recommendations for each room of your house or flat. 

  1. Let’s start with one of the most prefered choices for home floors – carpets. They have more than a couple of advantages on their side – carpets are great warmth and sound insulators, they are arguably the safest floor covering of all because you can hardly slip on them, which makes them the perfect option if you have toddlers or small children in the family. Carpeting, however, requires constant and regular sanitary upkeep – vacuum cleaning at least twice per week, more thorough washing is highly recommended twice per year, even better if you do it more often. It is more prone to damage and moulding and suffers the wear and tear of the everyday foot traffic worse than almost any other floor covering alternative. Do not also forget that the carpet stains are much more difficult to remove, so they might not be the best choice for certain rooms at home.
  2. You can look at rugs as a very close alternative to carpets, but I prefer to put them in a separate category. The differences are significant – I often think of rugs as the more expensive, more challenging to maintain, more aristocratic cousins of carpets. Do not get me wrong – I recognise their esthetic value and the unquestionable class they bring to the interior design of any space. From a purely practical point of view, however, they might be a nightmare to maintain. Be advised before you buy a thousand-pound piece for your living room and then spill some tea on it. 
  3. Wooden floors. They look classy and warm, especially if you get a high-quality contractor to do the fitting. Wood planks are a relatively good heat insulator (though not as good as carpets) and are easy to maintain from a cleaning point of view. They are significantly more durable and long-lasting than carpets – I would say a wooden floor is likely to last at least two if not three times more than a carpet with the proper care. The number one negative is that they are slippery, and pose risk health, especially for older people. If you live in a multi-floor apartment building, you should also consider the sound factor – this type of floor covering is arguably the noisiest you can pick. 
  4. Tile floors. In the interest of full disclosure, I will admit tiles are my personal favourite. They are by far the easiest to clean and maintain, and also the most durable. From a hygienic point of view, they are the best floor covering type, and I do not think it is particularly close. I will readily admit, however, that they have their deficiencies – compared to the three alternatives mentioned above, they are the worst sound and heat insulators, and the most slippery surface (although it is a close call between tiles and wooden floors). From numerous conversations with homeowners, I know that many people find them too sterile and cold – almost creating a hospital-like atmosphere and they do not want to reproduce at home. 

Now that I have covered the different types, what would be the most suitable choice for each room of your home? 

Let’s start with the bedroom. Since you do not move that much around and you are not likely to bring in too many beverages or dishes (unless you like the occasional snack in bed), the best choice would be carpets. They will create the requisite warmth and comfort and will be relatively easy to maintain. You can add a small rug or two for extra comfort and a nice personal touch if you feel like it. (The same, obviously, applies to all guest rooms.)

I would go for nothing else but a tile floor in the kitchen. Listen, if you frequently cook or eat there, the last thing you want on your mind is the multiple stains that will inevitably appear on the floor. You want a floor that is easy to clean and maintain, that you can sweep and polish in a minute if you spill some wine or olive oil on it. Can you imagine the pandemonium if you spill a pack of flour all over the place? No, thank you!

Tiles are also the obvious choice for the bathroom, but for a different reason. The consideration here is humidity – it will lead to mould on carpets and cracks on wooden planking. If you are worried about slippage, throw in a bath rug close to the tub or shower cabin – it should do the trick.

I left the most difficult choice for last – what should you do with the living room? Well, enough with the reason! How about you listen to your heart for a change? I think each of the floor covering options has its pros and cons, so you should choose the one that feels the best!